Welcome to CitadelHosts
Build Your Own Citadel. Secure, Yours, and Simple.
With CitadelHosts, you own your data. No vendor lock-in. No hidden fees. Just powerful, easy-to-use infrastructure — on your terms.
CitadelHosts was built on the belief that cloud hosting should be accessible to everyone — so people can truly own their data, operate their own piece of the web, and rule their digital domain.
Why CitadelHosts?
- Flexible: Our runners are OCI image compliant, so you can define your application to run in Docker and it will work on CitadelHosts.
- Smart Image Registry: The smart image registry is our unique solution to providing automated updates to your running application.
- App Store: 1-Click Deploy App Store allows you to deploy from a selection of free, open-source tools that are popular among users.
- Secure: We handle SSL and provide you with your very own link to access your applications. You can even make it so this link only works when signed into your CitadelHosts account.
- We're Here For You: We are here to help. Contact us if you have any questions!
Quick Start
Learn how to get started quickly by using one of our examples.
Explore Use Cases
See how others are using CitadelHosts:
Need Help?
Quick Start
Create Your Account
Create an account and get $25 in free credits just for being here and reading this tutorial! Click this link to activate.
Deploying Your First Application
Provisioning Your First Territory
In order to deploy your first application, you first need a Territory to deploy it on. A Territory is similar to a Virtual Private Server (VPS) except that on your Territory you configure all of the running applications through CitadelHosts. This makes it so you don't have to handle any of the configuration files or services manually. Instead, you just define applications in the platform and deploy them through the interface.
To create your first Territory, simply select "Create Territory" from your Dashboard. This will bring up a window that allows you to select how many resources you would like your Territory to have and you can see how much deploying is going to cost. For this guide, we are going to go with the Watchtower Territory size. 1vCPU and 2GB of RAM will be plenty for running a personal application.
Once your Territory has finished being provisioned by the backend, you should be brought back to the Dashboard, and now you should see your Territory. You can change the name of your Territory by clicking on "Watchtower" and typing a new name.
Deploying Your First Application
Great job! Now you have a Territory on CitadelHosts! But it doesn't seem like it is doing too much yet. Let's run an application on it. In order to deploy your own application in the Territory, you can press "Deploy App", navigate to the "Apps" page by clicking the corresponding link in the left sidebar or the Dashboard, or click here.
You can now see all of the available applications for your account in your own App Library. We are going to deploy an application called Trilium. Trilium is a notetaking, knowledge building application. I use it all the time for organizing my thoughts, so I pre configured it for everyone using CitadelHosts to be able to deploy easily. Select Trilium from your App Library to deploy it.
After you click on the application, it will take you to the deploy page for that application. On this page you can select which Territory you would like to deploy the application onto. If you have just been following this guide, you only have the one Watchtower Territory to select from in the selection box. As your services grow, you may have other options to select here, and the ability to manage multiple instances is as easy as selecting other Territories and deploying the application again.
Managing Your New Application
Deploying an application will take you back to the Dashboard. From here, you will now see the new Trilium application "Created" in your Territory. You can quickly control all of your applications from your dashboard. Click on the link for this application to view the Application Details page.
From here, you have a full breakdown of the details of your deployed application. You can explore the resource usage, mount Storage Volumes, and see the logs coming from the app. Click on "Start" to actually start your new application.
Once Trilium is up and running, you can load the application in your browser by going to your unique link that is presented as an Access Link from the Application Details page. This link automatically handles SSL encryption and provides a secure tunnel for you to access your app. You can secure this link further by toggling the "Require Authentication" to be on. This will require a user to be logged into your CitadelHosts account to be able to access your link/application.
What's Next?
That's all there is to it! You now have your very own Trilium instance running on CitadelHosts! You can even deploy more applications from the App Library to this one single Territory.
I hope this guide was able to show you just how easy it is to get up and running on CitadelHosts. But, CitadelHosts is also flexible enough to handle more complex deployments too. If you want to learn how to deploy your own custom applications on the platform, check out our framework guides.
Frameworks
These are some examples defined to show you how to do custom deployments on CitadelHosts. We tried to cover a range of frameworks, but obviously could not cover all of them. If you would like another framework listed here you can submit a support request.
| Framework Featured | Application Description |
|---|---|
| Flask | A cloud-native application featuring a SaaS metrics dashboard. Utilizes micro-services to distribute architecture. |
| Laravel+Svelte | Simple TODO application. |
| FastAPI+Svelte | A LLM chat interface that allows you to enter any OpenAI compatible API. Also packages a super light local LLM model, Qwen3.5-0.8B, to run in the example. |
| Next.js | Next.js application highlighting some of the most useful features of the framework. |
Flask
This example assumes you have already created your own Territory. If you have not, please refer to this guide.
In this tutorial we will be deploying our example application to CitadelHosts. We will upload the images that define our application to our Smart Image Registry. Then we will define our custom application in CitadelHosts. Finally, we will deploy that application to our own Territory instance.
Our Example Application
This Flask example application was intended to highlight Flask and it's ability to help user's design and create microservices in a minimal and efficient manner. We built a SaaS Metrics Dashboard. The application delivers some high level metrics that would be pertinent to a SaaS startup, such as Monthly Recurring Revenue (MRR) and Churn Rate.
The application is available on GitHub at: https://github.com/LiamJFitzpatrick/citadel-flask-example.
Uploading Custom Images To Your Smart Registry
The example application contains a Dockerfile for the Flask backend and and a Dockerfile.worker for the Python worker. These files define everything that our application needs to run. For our example, we have walkthroughs for deploying using GitHub Actions to build and upload your images or you can follow along the guide to build and deploy your images from your local machine using Docker.
Using GitHub Actions
An example deploy workflow is provided below. This will build the necessary images and upload them to your CitadelHosts account. You can clone the example repository and then push the code to your own GitHub repository. Whenever changes are pushed to your GitHub repository they will be automatically sent to your CitadelHosts registry. This is great to be able to enable automatic deployments.
.github/workflows/deploy.yml
name: Build and Push Container Images

on:
  push:
    branches:
      - develop
      - main
      - master
    tags:
      - 'v*'

env:
  REGISTRY: registry.citadelhosts.com
  FLASK_IMAGE_NAME: ${{ secrets.FLASK_IMAGE_NAME }}
  WORKER_IMAGE_NAME: ${{ secrets.WORKER_IMAGE_NAME }}

jobs:
  build-and-push:
    runs-on: ubuntu-latest
    permissions:
      contents: read
      packages: write

    steps:
      - name: Checkout code
        uses: actions/checkout@v4

      - name: Set up Docker Buildx
        uses: docker/setup-buildx-action@v3

      - name: Log in to private registry
        uses: docker/login-action@v3
        with:
          registry: ${{ env.REGISTRY }}
          username: ${{ secrets.REGISTRY_USERNAME }}
          password: ${{ secrets.REGISTRY_PASSWORD }}

      - name: Extract metadata for Flask app
        id: flask-meta
        uses: docker/metadata-action@v5
        with:
          images: ${{ env.REGISTRY }}/${{ env.FLASK_IMAGE_NAME }}
          tags: |
            type=ref,event=branch
            type=ref,event=pr
            type=semver,pattern={{version}}
            type=semver,pattern={{major}}.{{minor}}
            type=sha

      - name: Extract metadata for Worker
        id: worker-meta
        uses: docker/metadata-action@v5
        with:
          images: ${{ env.REGISTRY }}/${{ env.WORKER_IMAGE_NAME }}
          tags: |
            type=ref,event=branch
            type=ref,event=pr
            type=semver,pattern={{version}}
            type=semver,pattern={{major}}.{{minor}}
            type=sha

      - name: Build and push Flask app image
        uses: docker/build-push-action@v6
        with:
          context: .
          file: ./Dockerfile
          push: true
          tags: ${{ steps.flask-meta.outputs.tags }}
          labels: ${{ steps.flask-meta.outputs.labels }}
          cache-from: type=gha
          cache-to: type=gha,mode=max

      - name: Build and push Worker image
        uses: docker/build-push-action@v6
        with:
          context: .
          file: ./Dockerfile.worker
          push: true
          tags: ${{ steps.worker-meta.outputs.tags }}
          labels: ${{ steps.worker-meta.outputs.labels }}
          cache-from: type=gha
          cache-to: type=gha,mode=max
This deploy workflow requires the following secrets in your repository:
- FLASK_IMAGE_NAME: This is the name that the Flask backend will have in your CitadelHosts registry.
- WORKER_IMAGE_NAME: This is the name that the worker will have in your CitadelHosts registry.
- REGISTRY_USERNAME: This is your CitadelHosts username.
- REGISTRY_PASSWORD: This is your CitadelHosts password.
Using Docker CLI
Getting and Building The Application
After you have cloned the repository, navigate into the newly created folder.
git clone https://github.com/LiamJFitzpatrick/citadel-flask-example.git
cd citadel-flask-example
Build the Flask backend image and the worker image.
docker build -t registry.citadelhosts.com/flask-example-backend:latest -f Dockerfile ./
docker build -t registry.citadelhosts.com/flask-example-worker:latest -f Dockerfile.worker ./
Authenticate your Docker CLI with the CitadelHosts.com Smart Image Registry. You will login using the same credentials you use to login to CitadelHosts.com.
docker login registry.citadelhosts.com
Push your newly built images to your registry.
docker push registry.citadelhosts.com/flask-example-backend:latest
docker push registry.citadelhosts.com/flask-example-worker:latest
Congrats! You have successfully uploaded the example application to your CitadelHosts account!
Defining Custom Applications
To define a custom application navigate to the Apps page and scroll down to the Create Application section (or click this link: https://citadelhosts.com/dashboard/apps#create-application).
This form allows you to define custom application configurations.
Step 1: Application Definition
The first step is to define the application. The table below shows suggested input values for our example.
| Label | Value | Description |
|---|---|---|
| Name | Flask Example | This is the name of your application and will appear in your App Library |
| Description | An example cloud-native Flask application. | A description for your custom application. |
Step 2: Container Definition
The second step is to define the containers that will make up our application. Our example application consists of 5 containers, so you can hit Add Container for 5 containers. The suggested inputs are summarized in the tables below.
Container 1 Definition: Flask Backend
| Label | Value |
|---|---|
| Name: | backend |
| Start Order: | 4 |
| Image: | flask-example-backend:latest |
Container 2 Definition: Python worker
| Label | Value |
|---|---|
| Name: | worker |
| Start Order: | 5 |
| Image: | flask-example-worker:latest |
Container 3 Definition: Valkey
| Label | Value |
|---|---|
| Name: | valkey |
| Start Order: | 2 |
| Image: | Enter URL |
| docker.io/valkey/valkey:7-alpine |
Container 4 Definition: RustFS
| Label | Value |
|---|---|
| Name: | rustfs |
| Start Order: | 1 |
| Image: | Enter URL |
| docker.io/rustfs/rustfs:latest |
Container 5 Definition: RabbitMQ
| Label | Value |
|---|---|
| Name: | rabbitmq |
| Start Order: | 3 |
| Image: | Enter URL |
| docker.io/library/rabbitmq:3-management |
Step 3: Container Configuration
The final step in defining your custom application is going to be to configure ports, volumes, and environment variables for each of the containers that make up your application. The necessary configuration for our example application is summarized in the sections below.
backend Configuration
| Ports | |
|---|---|
| Container Port: | 5000 |
Environment Variables:
| Key | Value |
|---|---|
| VALKEY_HOST | localhost |
| VALKEY_PORT | 6379 |
| S3_ENDPOINT | localhost:9000 |
| S3_ACCESS_KEY | minioadmin |
| S3_SECRET_KEY | minioadmin |
| S3_BUCKET_NAME | saas-metrics-uploads |
| S3_USE_SSL | false |
| RABBITMQ_HOST | localhost |
| RABBITMQ_PORT | 5672 |
| RABBITMQ_USER | guest |
| RABBITMQ_PASS | guest |
| RABBITMQ_QUEUE | metrics-processing |
| SECRET_KEY | devsecretkey |
worker Configuration
Environment Variables:
| Key | Value |
|---|---|
| VALKEY_HOST | localhost |
| VALKEY_PORT | 6379 |
| S3_ENDPOINT | localhost:9000 |
| S3_ACCESS_KEY | minioadmin |
| S3_SECRET_KEY | minioadmin |
| S3_BUCKET_NAME | saas-metrics-uploads |
| S3_USE_SSL | false |
| RABBITMQ_HOST | localhost |
| RABBITMQ_PORT | 5672 |
| RABBITMQ_USER | guest |
| RABBITMQ_PASS | guest |
| RABBITMQ_QUEUE | metrics-processing |
valkey Configuration
Volume Mounts:
| Name | Container path |
|---|---|
| valkeydata | /data |
rustfs Configuration
Volume Mounts:
| Name | Container path |
|---|---|
| rustfsdata | /data |
Environment Variables:
| Key | Value |
|---|---|
| RUSTFS_SECRET_KEY | minioadmin |
| RUSTFS_ACCESS_KEY | minioadmin |
rabbitmq Configuration
Volume Mounts:
| Name | Container path |
|---|---|
| rabbitmqdata | /var/lib/rabbitmq |
Environment Variables:
| Key | Value |
|---|---|
| RABBITMQ_DEFAULT_USER | guest |
| RABBITMQ_DEFAULT_PASS | guest |
Finishing Up
Now that you have defined your application in the form, you just need to hit Create. You have succesfully defined your own custom Flask application on CitadelHosts! This application is available just to your account and can be deployed to any Territory of your choosing.
Deploying Custom Applications
Deploying custom applications is just as easy as deploying pre-configured applications. All one has to do is select the Territory you would like to deploy the application on and hit Deploy! Start the app up and navigate to your access link to view your own custom application. Great work!
Laravel+Svelte
This example assumes you have already created your own Territory. If you have not, please refer to this guide.
In this tutorial we will be deploying our example application to CitadelHosts. We will upload the images that define our application to our Smart Image Registry. Then we will define our custom application in CitadelHosts. Finally, we will deploy that application to our own Territory instance.
Our Example Application
This Laravel example application features a simple TODO app built with the Laravel Installer. It has a Svelte frontend. The application uses a SQlite database for simplicity.
The application is available on GitHub at: https://github.com/LiamJFitzpatrick/citadel-laravel-example.
Uploading Custom Images To Your Smart Registry
The example application contains a Dockerfile to define the application and it's environment. For our example, we have walkthroughs for deploying using GitHub Actions to build and upload your image or you can follow along the guide to build and deploy your image from your local machine using Docker.
Using GitHub Actions
An example deploy workflow is provided below. This will build the necessary images and upload them to your CitadelHosts account. You can clone the example repository and then push the code to your own GitHub repository. Whenever changes are pushed to your GitHub repository they will be automatically sent to your CitadelHosts registry. This is great to be able to enable automatic deployments.
.github/workflows/deploy.yml
name: Build and Push Container Image

on:
  push:
    branches:
      - develop
      - main
      - master
    tags:
      - 'v*'

env:
  REGISTRY: registry.citadelhosts.com
  IMAGE_NAME: ${{ secrets.IMAGE_NAME }}

jobs:
  build-and-push:
    runs-on: ubuntu-latest
    permissions:
      contents: read
      packages: write

    steps:
      - name: Checkout code
        uses: actions/checkout@v4

      - name: Set up Docker Buildx
        uses: docker/setup-buildx-action@v3

      - name: Log in to private registry
        uses: docker/login-action@v3
        with:
          registry: ${{ env.REGISTRY }}
          username: ${{ secrets.REGISTRY_USERNAME }}
          password: ${{ secrets.REGISTRY_PASSWORD }}

      - name: Extract metadata
        id: meta
        uses: docker/metadata-action@v5
        with:
          # Combines registry and image name into a clean string
          images: ${{ env.REGISTRY }}/${{ env.IMAGE_NAME }}
          tags: |
            type=ref,event=branch
            type=ref,event=pr
            type=semver,pattern={{version}}
            type=semver,pattern={{major}}.{{minor}}
            type=sha

      - name: Build and push
        uses: docker/build-push-action@v6
        with:
          context: .
          push: true
          tags: ${{ steps.meta.outputs.tags }}
          labels: ${{ steps.meta.outputs.labels }}
          cache-from: type=gha
          cache-to: type=gha,mode=max
This deploy workflow requires the following secrets in your repository:
- IMAGE_NAME: This is the name that the Laravel application image will have in your CitadelHosts registry.
- REGISTRY_USERNAME: This is your CitadelHosts username.
- REGISTRY_PASSWORD: This is your CitadelHosts password.
Using Docker CLI
Getting and Building The Application
After you have cloned the repository, navigate into the newly created folder.
git clone https://github.com/LiamJFitzpatrick/citadel-laravel-example.git
cd citadel-laravel-example
Build the Laravel application image.
docker build -t registry.citadelhosts.com/laravel-example:latest -f Dockerfile ./
Authenticate your Docker CLI with the CitadelHosts.com Smart Image Registry. You will login using the same credentials you use to login to CitadelHosts.com.
docker login registry.citadelhosts.com
Push your newly built images to your registry.
docker push registry.citadelhosts.com/laravel-example:latest
Congrats! You have successfully uploaded the example application to your CitadelHosts account!
Defining Custom Applications
To define a custom application navigate to the Apps page and scroll down to the Create Application section (or click this link: https://citadelhosts.com/dashboard/apps#create-application).
This form allows you to define custom application configurations.
Step 1: Application Definition
The first step is to define the application. The table below shows suggested input values for our example.
| Label | Value | Description |
|---|---|---|
| Name | Laravel Example | This is the name of your application and will appear in your App Library |
| Description | An simple TODO application built with Laravel. | A description for your custom application. |
Step 2: Container Definition
The second step is to define the containers that will make up our application. Our example application consists of 1 container, so you can hit Add Container for 1 container. The suggested inputs are summarized in the tables below.
Container 1 Definition: Laravel Application
| Label | Value |
|---|---|
| Name: | todoapp |
| Start Order: | 0 |
| Image: | citadel-laravel-example:latest |
Step 3: Container Configuration
The final step in defining your custom application is going to be to configure ports, volumes, and environment variables for each of the containers that make up your application. The necessary configuration for our example application is summarized in the sections below.
backend Configuration
| Ports | |
|---|---|
| Container Port: | 80 |
Environment Variables:
| Key | Value |
|---|---|
| APP_ENV | production |
| APP_DEBUG | false |
Finishing Up
Now that you have defined your application in the form, you just need to hit Create. You have succesfully defined your own custom Laravel application on CitadelHosts! This application is available just to your account and can be deployed to any Territory of your choosing.
Deploying Custom Applications
Deploying custom applications is just as easy as deploying pre-configured applications. All one has to do is select the Territory you would like to deploy the application on and hit Deploy! Start the app up and navigate to your access link to view your own custom application. Great work!
FastAPI+Svelte
This example assumes you have already created your own Territory. If you have not, please refer to this guide.
In this tutorial we will be deploying our example application to CitadelHosts. We will upload the images that define our application to our Smart Image Registry. Then we will define our custom application in CitadelHosts. Finally, we will deploy that application to our own Territory instance.
Our Example Application
This example application features a FastAPI backend, a Svelte frontend, and a super light LLM, Qwen3.5-0.8B packaged in a llama.cpp image. The application allows you to point the backend to any OpenAI compatible inference API. The Qwen3.5-0.8B model is packaged in the example to highlight the fact that very basic inference can be run even on under 2GB of RAM on the CPU. The model will run under this resource constraint but it will run very slowly still with just a single server CPU running the inference and is not really the recommended way to interact with an LLM on this platform.
The application is available on GitHub at: https://github.com/LiamJFitzpatrick/citadel-fastapi-svelte-example
Uploading Custom Images To Your Smart Registry
The example application consists of three custom images that need to be uploaded to the Smart Image Registry. The first image is the FastAPI backend defined at ./backend/Dockerfile. The second is the Svelte frontend defined at ./frontend/Dockerfile. The third image for the Qwen3.5 model is defined at ./Dockerfile.qwen3.5-08b.
Using GitHub Actions
An example deploy workflow is provided below. This will build the necessary images and upload them to your CitadelHosts account. You can clone the example repository and then push the code to your own GitHub repository. Whenever changes are pushed to your GitHub repository they will be automatically sent to your CitadelHosts registry. This is great to be able to enable automatic deployments.
.github/workflows/deploy.yml
name: Build and Push Container Images

on:
  push:
    branches:
      - develop
      - main
      - master
    tags:
      - 'v*'

env:
  REGISTRY: registry.citadelhosts.com
  SVELTE_IMAGE_NAME: ${{ secrets.SVELTE_IMAGE_NAME }}
  FASTAPI_IMAGE_NAME: ${{ secrets.FASTAPI_IMAGE_NAME }}
  LLM_IMAGE_NAME: ${{ secrets.LLM_IMAGE_NAME }}

jobs:
  build-and-push:
    runs-on: ubuntu-latest
    permissions:
      contents: read
      packages: write

    steps:
      - name: Checkout code
        uses: actions/checkout@v4

      - name: Set up Docker Buildx
        uses: docker/setup-buildx-action@v3

      - name: Log in to private registry
        uses: docker/login-action@v3
        with:
          registry: ${{ env.REGISTRY }}
          username: ${{ secrets.REGISTRY_USERNAME }}
          password: ${{ secrets.REGISTRY_PASSWORD }}

      - name: Extract metadata for Svelte app
        id: svelte-meta
        uses: docker/metadata-action@v5
        with:
          images: ${{ env.REGISTRY }}/${{ env.SVELTE_IMAGE_NAME }}
          tags: |
            type=ref,event=branch
            type=ref,event=pr
            type=semver,pattern={{version}}
            type=semver,pattern={{major}}.{{minor}}
            type=sha

      - name: Extract metadata for FastAPI
        id: fastapi-meta
        uses: docker/metadata-action@v5
        with:
          images: ${{ env.REGISTRY }}/${{ env.FASTAPI_IMAGE_NAME }}
          tags: |
            type=ref,event=branch
            type=ref,event=pr
            type=semver,pattern={{version}}
            type=semver,pattern={{major}}.{{minor}}
            type=sha

      - name: Extract metadata for LLM
        id: llm-meta
        uses: docker/metadata-action@v5
        with:
          images: ${{ env.REGISTRY }}/${{ env.LLM_IMAGE_NAME }}
          tags: |
            type=ref,event=branch
            type=ref,event=pr
            type=semver,pattern={{version}}
            type=semver,pattern={{major}}.{{minor}}
            type=sha

      - name: Build and push Svelte app image
        uses: docker/build-push-action@v6
        with:
          context: .
          file: ./frontend/Dockerfile
          push: true
          tags: ${{ steps.svelte-meta.outputs.tags }}
          labels: ${{ steps.svelte-meta.outputs.labels }}
          cache-from: type=gha
          cache-to: type=gha,mode=max

      - name: Build and push FastAPI image
        uses: docker/build-push-action@v6
        with:
          context: .
          file: ./backend/Dockerfile
          push: true
          tags: ${{ steps.fastapi-meta.outputs.tags }}
          labels: ${{ steps.fastapi-meta.outputs.labels }}
          cache-from: type=gha
          cache-to: type=gha,mode=max

      - name: Build and push LLM image
        uses: docker/build-push-action@v6
        with:
          context: .
          file: ./Dockerfile.qwen3.5-0.8b
          push: true
          tags: ${{ steps.llm-meta.outputs.tags }}
          labels: ${{ steps.llm-meta.outputs.labels }}
          cache-from: type=gha
          cache-to: type=gha,mode=max
This deploy workflow requires the following secrets in your repository:
- SVELTE_IMAGE_NAME: This is the name that the Svelte frontend will have in your CitadelHosts registry.
- FASTAPI_IMAGE_NAME: This is the name that the FastAPI backend will have in your CitadelHosts registry.
- LLM_IMAGE_NAME: This is the name that the llama.cpp server will have in your CitadelHosts registry.
- REGISTRY_USERNAME: This is your CitadelHosts username.
- REGISTRY_PASSWORD: This is your CitadelHosts password.
Using Docker CLI
Getting and Building The Application
After you have cloned the repository, navigate into the newly created folder.
git clone https://github.com/LiamJFitzpatrick/citadel-fastapi-svelte-example.git
cd citadel-fastapi-svelte-example
Build the FastAPI backend image, the Svelte frontend image, and the llama.cpp bundle with Qwen3.5-08B image.
docker build -t registry.citadelhosts.com/fastapi-example-backend:latest ./backend/
docker build -t registry.citadelhosts.com/svelte-example-frontend:latest ./frontend/
docker build -t registry.citadelhosts.com/llm-example:latest -f ./Dockerfile.qwen3.5-0.8b ./
Authenticate your Docker CLI with the CitadelHosts.com Smart Image Registry. You will login using the same credentials you use to login to CitadelHosts.com.
docker login registry.citadelhosts.com
Push your newly built images to your registry.
docker push registry.citadelhosts.com/fastapi-example-backend:latest
docker push registry.citadelhosts.com/svelte-example-frontend:latest
docker push registry.citadelhosts.com/llm-example:latest
Congrats! You have successfully uploaded the example application to your CitadelHosts account!
Defining Custom Applications
To define a custom application navigate to the Apps page and scroll down to the Create Application section (or click this link: https://citadelhosts.com/dashboard/apps#create-application).
This form allows you to define custom application configurations.
Step 1: Application Definition
The first step is to define the application. The table below shows suggested input values for our example.
| Label | Value | Description |
|---|---|---|
| Name | FastAPI+Svelte Example | This is the name of your application and will appear in your App Library |
| Description | An example LLM chat interface built with FastAPI and Svelte. | A description for your custom application. |
Step 2: Container Definition
The second step is to define the containers that will make up our application. Our example application consists of 3 containers, so you can hit Add Container for 3 containers. The suggested inputs are summarized in the tables below.
Container 1 Definition: FastAPI Backend
| Label | Value |
|---|---|
| Name: | backend |
| Start Order: | 2 |
| Image: | fastapi-example-backend:latest |
Container 2 Definition: Svelte Frontend
| Label | Value |
|---|---|
| Name: | frontend |
| Start Order: | 3 |
| Image: | svelte-example-frontend:latest |
Container 3 Definition: Llama.cpp Server
| Label | Value |
|---|---|
| Name: | llama |
| Start Order: | 1 |
| Image: | llm-example:latest |
Step 3: Container Configuration
The final step in defining your custom application is going to be to configure ports, volumes, and environment variables for each of the containers that make up your application. The necessary configuration for our example application is summarized in the sections below.
frontend Configuration
| Ports | |
|---|---|
| Container Port: | 80 |
Environment Variables:
| Key | Value |
|---|---|
| BACKEND_URL | http://127.0.0.1:8000 |
Finishing Up
Now that you have defined your application in the form, you just need to hit Create. You have succesfully defined your own custom LLM chat interface application on CitadelHosts! This application is available just to your account and can be deployed to any Territory of your choosing.
Deploying Custom Applications
Deploying custom applications is just as easy as deploying pre-configured applications. All one has to do is select the Territory you would like to deploy the application on and hit Deploy! Start the app up and navigate to your access link to view your own custom application. Great work!
Next.js
This example assumes you have already created your own Territory. If you have not, please refer to this guide.
In this tutorial we will be deploying our example application to CitadelHosts. We will upload the images that define our application to our Smart Image Registry. Then we will define our custom application in CitadelHosts. Finally, we will deploy that application to our own Territory instance.
Our Example Application
This application is intended to highlight some of the powerful features that the Next.js framework gives you. The demo utilizes Dynamic Routing, Server Actions, Component Architecture, and API Routes. These features are all demoed and able to be deployed right here on CitadelHosts.
The application is available on GitHub at: https://github.com/LiamJFitzpatrick/citadel-nextjs-example.
Uploading Custom Images To Your Smart Registry
The example application contains a Dockerfile. These files define everything that our application needs to run. For our example, we have walkthroughs for deploying using GitHub Actions to build and upload your images or you can follow along the guide to build and deploy your images from your local machine using Docker.
Using GitHub Actions
An example deploy workflow is provided below. This will build the necessary images and upload them to your CitadelHosts account. You can clone the example repository and then push the code to your own GitHub repository. Whenever changes are pushed to your GitHub repository they will be automatically sent to your CitadelHosts registry. This is great to be able to enable automatic deployments.
.github/workflows/deploy.yml
name: Build and Push Container Images

on:
  push:
    branches:
      - develop
      - main
      - master
    tags:
      - 'v*'

env:
  REGISTRY: registry.citadelhosts.com
  IMAGE_NAME: ${{ secrets.IMAGE_NAME }}

jobs:
  build-and-push:
    runs-on: ubuntu-latest
    permissions:
      contents: read
      packages: write

    steps:
      - name: Checkout code
        uses: actions/checkout@v4

      - name: Set up Docker Buildx
        uses: docker/setup-buildx-action@v3

      - name: Log in to private registry
        uses: docker/login-action@v3
        with:
          registry: ${{ env.REGISTRY }}
          username: ${{ secrets.REGISTRY_USERNAME }}
          password: ${{ secrets.REGISTRY_PASSWORD }}

      - name: Extract metadata
        id: next-meta
        uses: docker/metadata-action@v5
        with:
          images: ${{ env.REGISTRY }}/${{ env.IMAGE_NAME }}
          tags: |
            type=ref,event=branch
            type=ref,event=pr
            type=semver,pattern={{version}}
            type=semver,pattern={{major}}.{{minor}}
            type=sha

      - name: Build and push app image
        uses: docker/build-push-action@v6
        with:
          context: .
          file: ./Dockerfile
          push: true
          tags: ${{ steps.next-meta.outputs.tags }}
          labels: ${{ steps.next-meta.outputs.labels }}
          cache-from: type=gha
          cache-to: type=gha,mode=max
This deploy workflow requires the following secrets in your repository:
- IMAGE_NAME: This is the name that image will have in your CitadelHosts registry.
- REGISTRY_USERNAME: This is your CitadelHosts username.
- REGISTRY_PASSWORD: This is your CitadelHosts password.
Using Docker CLI
Getting and Building The Application
After you have cloned the repository, navigate into the newly created folder.
git clone https://github.com/LiamJFitzpatrick/citadel-nextjs-example.git
cd citadel-nextjs-example
Build the Next.js image.
docker build -t registry.citadelhosts.com/nextjs-example:latest -f Dockerfile ./
Authenticate your Docker CLI with the CitadelHosts.com Smart Image Registry. You will login using the same credentials you use to login to CitadelHosts.com.
docker login registry.citadelhosts.com
Push your newly built images to your registry.
docker push registry.citadelhosts.com/nextjs-example:latest
Congrats! You have successfully uploaded the example application to your CitadelHosts account!
Defining Custom Applications
To define a custom application navigate to the Apps page and scroll down to the Create Application section (or click this link: https://citadelhosts.com/dashboard/apps#create-application).
This form allows you to define custom application configurations.
Step 1: Application Definition
The first step is to define the application. The table below shows suggested input values for our example.
| Label | Value | Description |
|---|---|---|
| Name | Next.js Example | This is the name of your application and will appear in your App Library |
| Description | An example Next.js app, highlighting some of the great features of Next.js. | A description for your custom application. |
Step 2: Container Definition
The second step is to define the containers that will make up our application. Our example application consists of 1 container, so you can hit Add Container for 1 container. The suggested inputs are summarized in the tables below.
Container 1 Definition: Flask Backend
| Label | Value |
|---|---|
| Name: | next |
| Start Order: | 0 |
| Image: | nextjs-example:latest |
Step 3: Container Configuration
The final step in defining your custom application is going to be to configure ports, volumes, and environment variables for each of the containers that make up your application. The necessary configuration for our example application is summarized in the sections below.
next Configuration
| Ports | |
|---|---|
| Container Port: | 3000 |
Finishing Up
Now that you have defined your application in the form, you just need to hit Create. You have succesfully defined your own custom Next.js application on CitadelHosts! This application is available just to your account and can be deployed to any Territory of your choosing.
Deploying Custom Applications
Deploying custom applications is just as easy as deploying pre-configured applications. All one has to do is select the Territory you would like to deploy the application on and hit Deploy! Start the app up and navigate to your access link to view your own custom application. Great work!
Use Cases
Create Your Own Personal Cloud Storage
Replace Dropbox, Google Drive, or OneDrive — with full control and privacy.
The Problem
Public cloud storage services like Dropbox, Google Drive, and OneDrive offer convenience, but they come with significant trade-offs:
- Limited control: You don’t own your data — providers can access, scan, or share it under certain conditions.
- Privacy concerns: Data is stored on third-party servers, often in undisclosed locations.
- Vendor lock-in: Migrating data between platforms is cumbersome and sometimes impossible.
- No customization: You can't modify features, integrate with other tools, or tailor the experience.
By setting up your own cloud storage, you regain full ownership of your data, ensure privacy, and gain complete control over access, sharing, and infrastructure.
The Solution
Self-hosted cloud storage gives you the freedom to store, manage, and share files on your own terms. Whether you're an individual managing personal documents or a small team collaborating securely, self-hosting eliminates reliance on external providers.
In this guide, we’ll walk you through setting up Sync-In, a lightweight, secure, and easy-to-deploy open-source cloud storage solution. It’s ideal for personal use or small teams and integrates seamlessly with Citadel Hosts’ Watchtower Territory infrastructure.
Video Tutorial
💡 Pro Tip: Watch the video for a visual walkthrough of each step.
Step-by-Step Setup Guide
1. Choose Your Cloud Storage Platform
While several open-source options exist, we recommend Sync-In for this tutorial due to its:
- Minimal resource footprint
- Clean, intuitive UI
- Fast deployment via Citadel Hosts
- Strong security model with end-to-end encryption (optional)
- Built-in file sharing and access controls
Other popular alternatives:
- Nextcloud: Feature-rich with calendar, contacts, video conferencing, and collaboration tools. Best for larger teams.
- Seafile: Optimized for performance and large-scale file handling; supports virtual file systems and selective syncing.
2. Access the App Library
Log in to your Citadel Hosts dashboard and navigate to the Apps section in the sidebar.
You’ll see a list of pre-configured applications ready to deploy.
3. Deploy Sync-In
- Search for Sync-In in the App Library.
- Click on the application.
- Select the Watchtower Territory where you want to host your cloud storage.
- Configure the following environment variables:
INIT_ADMIN_LOGIN: Set a unique username (e.g.,admin).INIT_ADMIN_PASSWORD: Set a strong, secure password (e.g.,MySecurePass!2025).- (Optional)
DOMAIN— if you plan to use a custom domain later.
⚠️ Security Note: Never use default credentials. Use a password manager to generate and store your credentials securely.

4. Create a Storage Volume
To store your files, you’ll need dedicated storage. Sync-In requires a persistent volume to save user data.
- Go to the Storage section in your dashboard sidebar.
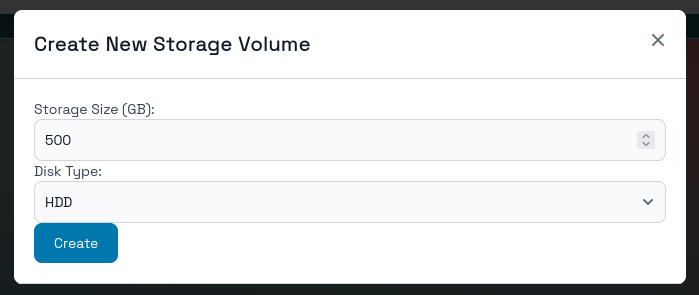
- Click Create Storage Volume.
- Fill in the details:
- Size: Start with 500 GB (adjust based on your needs).
- Storage Type:
- HDD: Cost-effective, suitable for most personal use.
- SSD: Faster performance, better for frequent access or large files.
- Region: Choose the same region as your Watchtower Territory for optimal latency.
- Click Create Volume.

5. Attach Storage to Sync-In
Now, link your storage volume to your Sync-In instance.
- Go to the App Details page for your Sync-In deployment.
- Scroll down to the Storage section.
- Click the Mount Storage icon.
- Select the storage volume you just created.
- Mount it to the
datavolume path (this is the default expected directory for Sync-In’s file storage).
✅ Ensure the mount point is set to
data— this is critical for Sync-In to function correctly.
6. Start Your Cloud Storage
Once the volume is attached:
- Click Start to launch your Sync-In instance.
- Wait a few moments for the application to initialize.
Your unique access URL will appear at the top of the App Details page.
👉 Example: https://syncin-abc123.citadelhosts.com
🛡️ Security Reminder: Share this link only with trusted individuals. You can also enable two-factor authentication (2FA) in the app settings once logged in.
Access and Use Your Cloud Storage
- Open the access link in your browser.
- Log in using the admin credentials you set earlier.
- Create folders, upload files, and invite others via share links.
- Use the web interface or install the Sync-In client for desktop/mobile to sync files automatically.
Advanced Tips & Best Practices
- Backups: Schedule regular backups of your storage volume to prevent data loss.
- Monitoring: Use Citadel Hosts’ dashboard to monitor storage usage and performance.
- Custom Domain: Once ready, point a custom domain (e.g.,
cloud.yourname.com) to your instance via DNS.
Conclusion
With just a few clicks, you’ve replaced third-party cloud storage with a private, secure, and fully customizable solution. You now control your data, your privacy, and your digital footprint.
Whether you're backing up photos, collaborating with friends, or managing team files, your own cloud storage is fast, reliable, and entirely under your control.
Stream Your Media — and Manage Files
Own your own media streaming service, supporting video, music, and photos.
The Problem
Streaming services, like Netflix, Hulu, and Spotify, have been gradually raising their prices and the services are splitting which shows are available on each of them. So you continue to pay more for shows that you have no control over which movies and shows are available on.
If you have movies, music, or any media that you want to be available to you for your entire life and even to your children's lives, you have to own that media yourself.
The Solution
Use CitadelHosts to:
- Stream all of your content through Jellyfin
- Use Sync-In to sync files from your computer or manage them in your browser
- Create a Storage Volume to connect a storage backend to the applications
In this guide we will walk you through setting all of this up on CitadelHosts, but the concept is possible to be done on any self hosted hardware as well.
Video Tutorial
Setup Steps
1. Create a Territory (e.g., media-territory)
First step is to provision a Territory to host your media server on. On CitadelHosts this is as easy as navigating to your dashboard at citadelhosts.com/dashboard.
You then can select the "Create Territory" button to bring up the Territory creation modal.
We will be creating a Watchtower for the purposes of this guide as that is probably the best place for most users to start. High resolution video encoding can be resource intensive, especially if you anticipate multiple streams (multiple users) on your Jellyfin instance. You may need to increase your resource allocation for the Territory providing your media serving if you find the Watchtower resources are not sufficient.
2. Add Jellyfin & Sync-In to Territory
Your newly provisioned Territory is ready to have applications installed on it. To do this, navigate to your dashboard and select "Add App". Select Jellyfin, then repeat this for Sync-In.
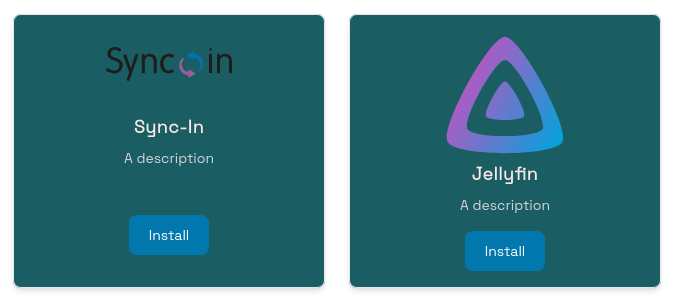
We will be installing Jellyfin. Jellyfin is an open-source media streaming application. They have a large community of supporters around the project. They even have applications supporting many different devices, like Roku, iOs, and Android. Jellyfin has great documentation and it might be worth reading their project documentation if you want to dive deeper into it. After you add Jellyfin to your Territory click on the link for the application in your dashboard to view the application's details page. From here you can press Start on Jellyfin and wait for the application to begin running.
After Jellyfin has started running you can click on your access link at the top of the Jellyfin details page to begin the setup process for Jellyfin. You will be presented with a welcome page and you can step through the quick start guide. But generally you just need to hit next through the Wizard and setup a username and password for your instance. Do not worry about setting up a media library because we will be adding that later after we setup the Storage Volume.

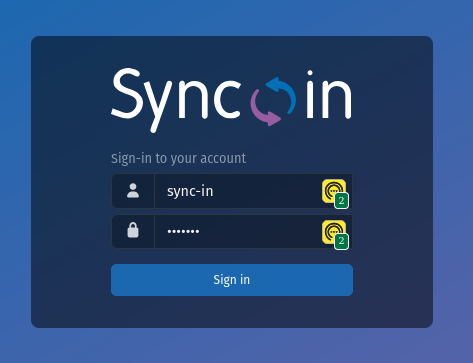
Sync-In is the application that we will be using to manage the actual media files in our media server. Sync-In provides WebDAV support so that we can mount a network drive to our personal laptops to upload files to our media server from our computers. We are going to do the same thing with Sync-In, get the application started and then navigate to the access link for this application once it is running.
Sync-In is going to be initialized with the username "sync-in" and the password "sync-in". This is just the defaults set for the application on CitadelHosts. You are going to want to change these as they are not secure and anyone could access your media files unless you turn on the require authentication toggle for requiring CitadelHosts authentication to access the app. But this will block you from mounting the application as a network drive.
You can change the username and password by navigating to the top right of your Sync-In instance, after logging in. Select your user account and hit the cog icon to go to settings. You will then navigate to Edit User. Inside the Password field you can type a new password and hit Confirm.

3. Add Storage Volume → Name it Media Library
The cool part about CitadelHosts here is that we can share a storage backend across these two applications. This lets us combine these two applications to work together and provide a better user experience.
Navigate to your Storage Volumes page at citadelhosts.com/dashboard/storage. From here you will select "Create Storage Volume". This will pop up a modal.
You can choose the type of storage that you think would be best for your needs. SSD storage is going to be faster but more expensive. HDD storage is slower but cheaper. For this guide, the recommendation is to create HDD storage and to start with 500 GB.
Now we can mount this storage backend to our two applications. To mount a storage volume to an application you can navigate to the application details page. Remember, we get there by going to the dashboard at citadelhosts.com/dashboard and then clicking on the link for our application inside of our territory. So for this guide the links would be for Jellyfin and Sync-In inside of our media-territory.
Scroll to the bottom of the application details page to control the application's storage. Click on the Stack icon to mount a Storage Volume to the application.
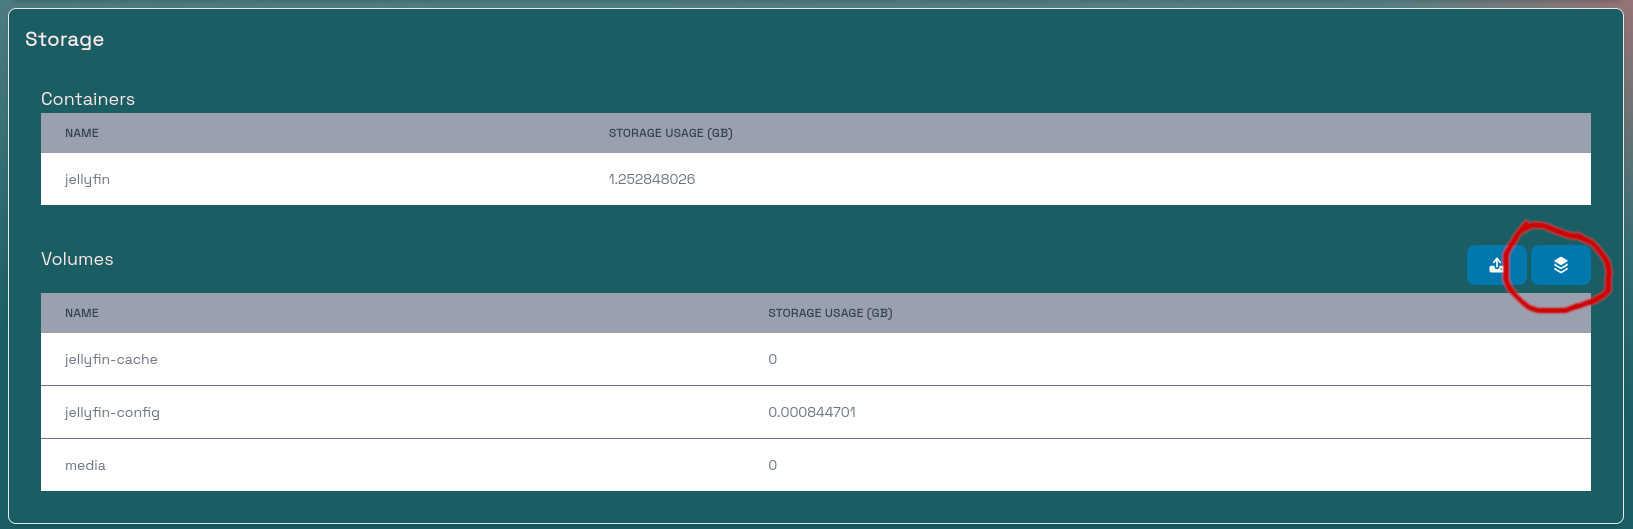
This will bring up the control modal to mount a storage volume. Select the Storage Volume that we just created and mount it to the media volume for Jellyfin. For Sync-In, you will select the same Storage Volume but mount it to data volume for Sync-In.

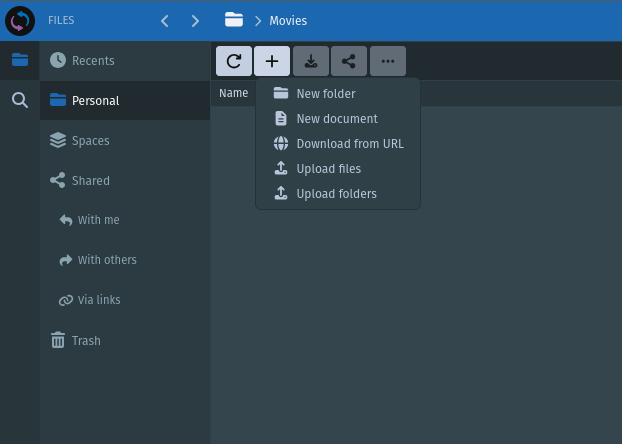
4. Sync your files → From your laptop or phone
You can now upload files to your Sync-In instance. My recommendation is to create a folder under Personal in Sync-In and call it Movies for your Movies and another one for TVShows. You can learn more about how the files should be organized on Jellyfin's documentation. This page shows for movies.
We also need to configure Jellyfin to be able to find our new media files. To do this, you should go back to your Jellyfin application, select the User icon in the top right and then hit Dashboard. This is where you control your Jellyfin instance, but we are interested in the Libraries section -> so click on that.

Now you can press on Add Library. This will open a new window. Select your media type and then navigate to the /media/<the folder in your Sync-In instance>.
5. Stream → Open Jellyfin and enjoy!
That's it! You can now add media as you collect it and stream your collection from anywhere. That's better than the theaters!
🎥 Watch movies, listen to music, browse photos — all from one place.
Benefits
- ✅ Full file control
- ✅ Private, secure, and fast
📌 Ideal for personal media libraries, home theaters, or shared family collections.